What is an HAR file?
HAR (short for HTTP Archive) is a format used for tracking information between a web browser and a website. A HAR file is primarily used for identifying performance issues, such as bottlenecks and slow load times, and page rendering problems. The HAR file keeps track of each resource loaded by the browser along with timing information for each resource. If you would like to learn more about HAR files, click on the following link.
https://www.keycdn.com/support/what-is-a-har-file
When would I want to get an HAR file?
Here is a potential scenario. There is a student who is trying to access their account, retrieve some information, submit a file, etc., but they cannot and instead keep getting an error. To help those on the back end diagnose the problem, you can send them a log of information for them to examine, and that is the HAR file.
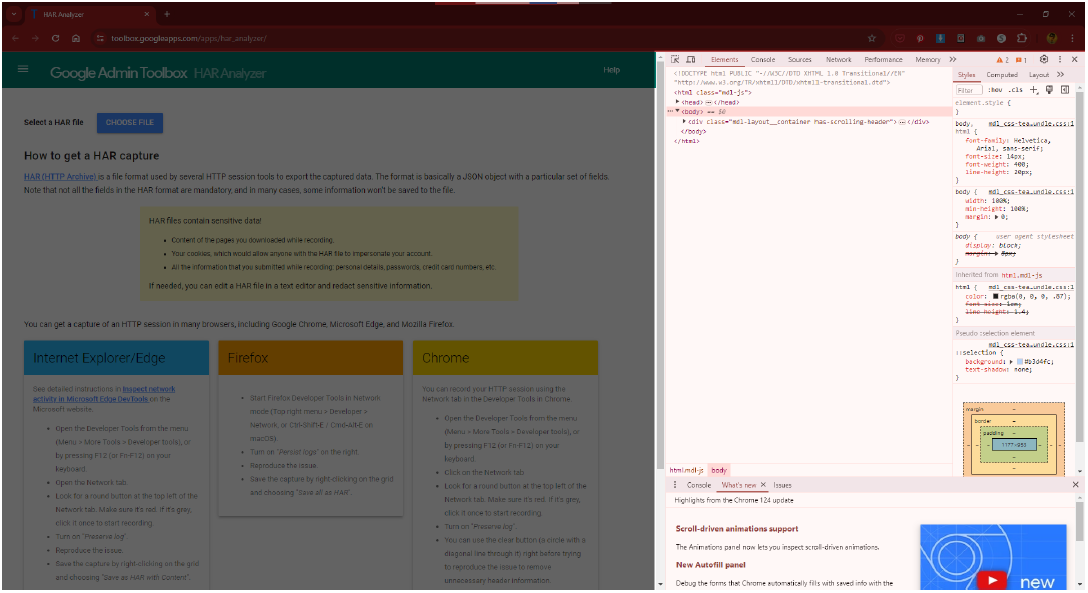
How do I get an HAR file?
The following are the steps to get an HAR file accompanied with visual aids to help you.
STEP ONE
If you want to get an HAR file, start by clicking the F12 key which will open a tool called Inspector. Note: On most web pages, you can also right-click somewhere within the browser window to open a dropdown menu and select Inspect.
STEP TWO
Within Inspector’s toolbar, select the tab titled Network.
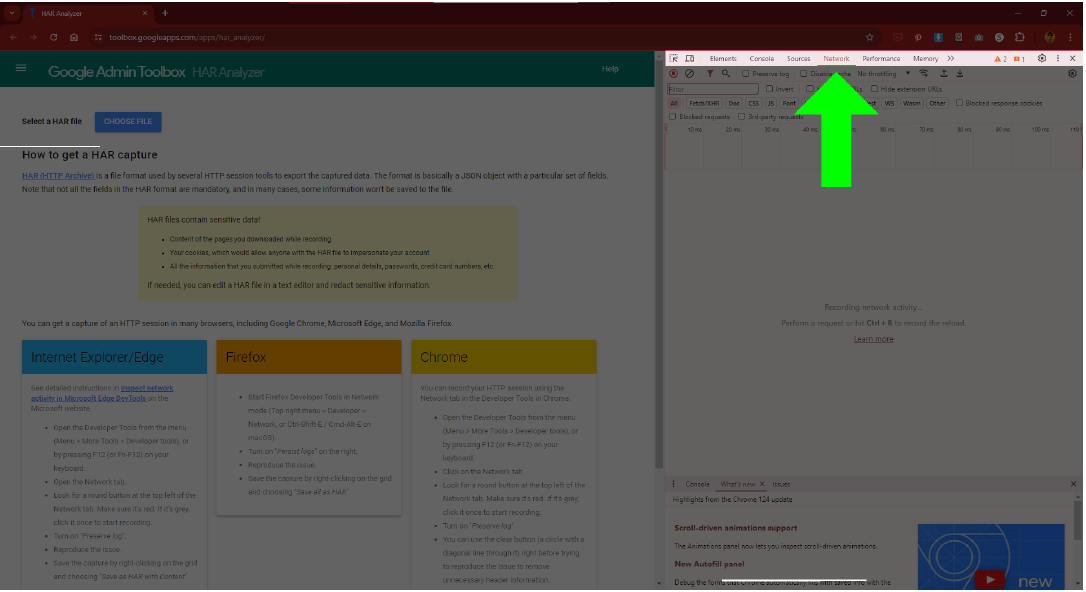
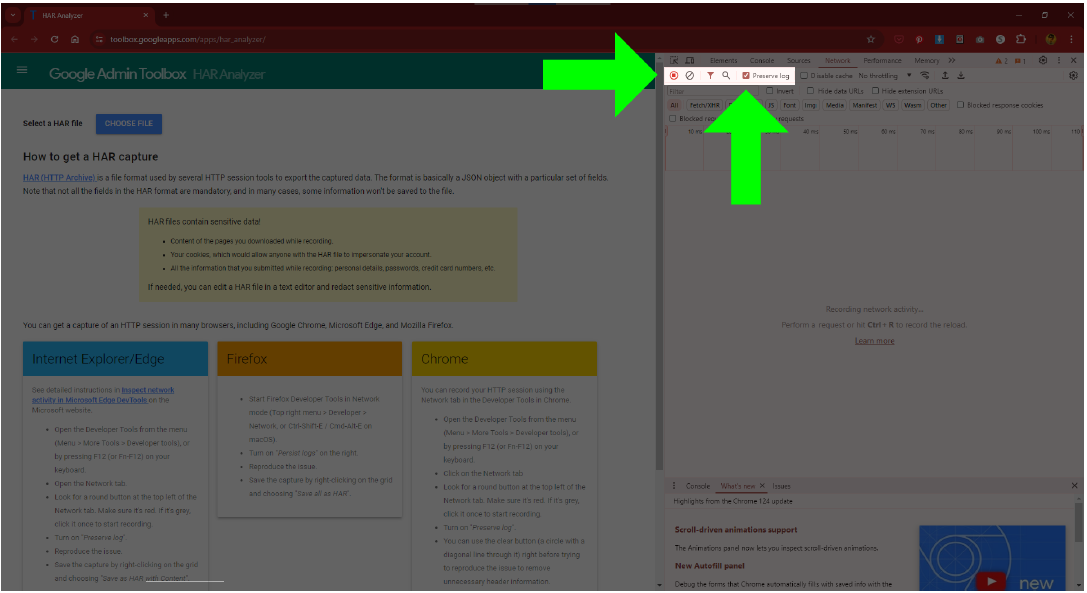
STEP THREE
Make sure to turn on the Recording Network option (RED for ON, BLACK for OFF) and to check the box to the left of the Preserve log option.
STEP FOUR
At this point, everything’s set up for the browser to create a record of everything that happens while the browser is being used. You can close Inspector by pressing F12 again. Now, have the user repeat the same steps that lead them to the error in questions. Once they have, continue with the next step.
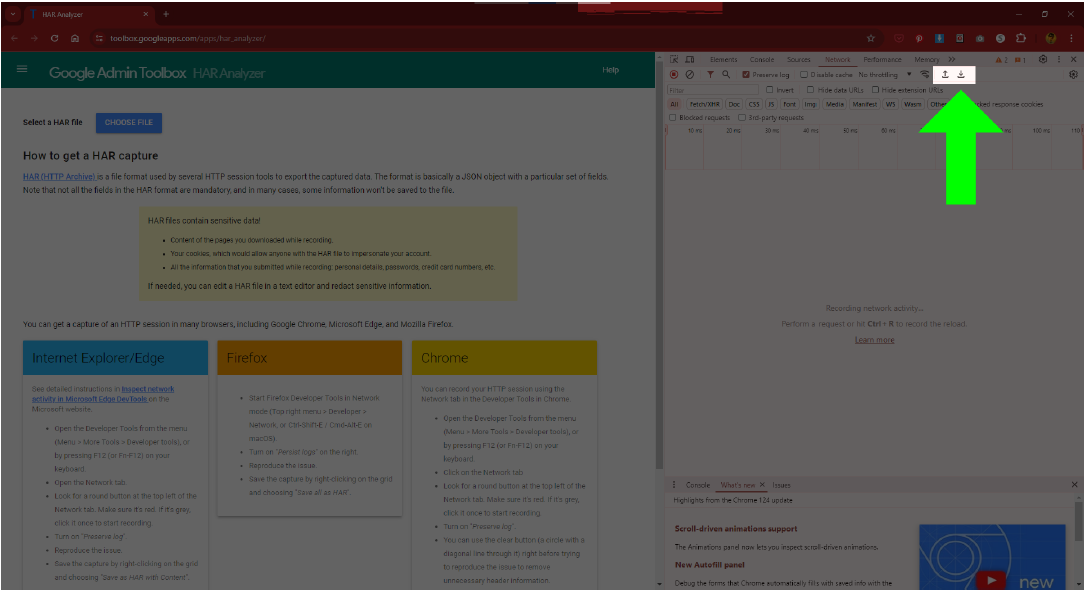
STEP FIVE
Reopen Inspector (F12) and within Inspector’s toolbar, click the download button (of the two buttons with arrows, it’s the one on the right that is pointing downward towards a base line). A new window will open for you to choose the name and location of the created HAR file.
And that is it. Well done!